To install our first-party tracking with Google Tag Manager you need to add two Custom HTML tags: “Target Circle entrypoint” and “Target Circle checkout” . The entrypoint tag will set the 1st party cookie with our tracking ID tmt_data and redirect the user to the target URL on the advertiser’s website. Because this tag will redirect the user you have to create a dedicated page and only fire the tag there. This dedicated page is where all tracking links will point to. The checkout tag reads the cookie and passes the tracking ID back to our tracking server. This tag should fire on the confirmation page only and relies on custom variables, for example, the ID of the transaction.
Creating the entrypoint tag
1. Create a new page that will be the dedicated page for firing this tag.
This step is specific for the CMS that you are using to manage your website content. If you don’t know how to do this, you should reach out to the support of the CMS you are using.
The page can be renamed to anything you like. The URL pointing to the location should be added in the tracking tab of the Offer creator:

It is important that the URL that is set up in the Offer creator always corresponds with the actual location of the entry point tag, otherwise tracking will not work. Therefore we do not recommend changing the location initial set up.
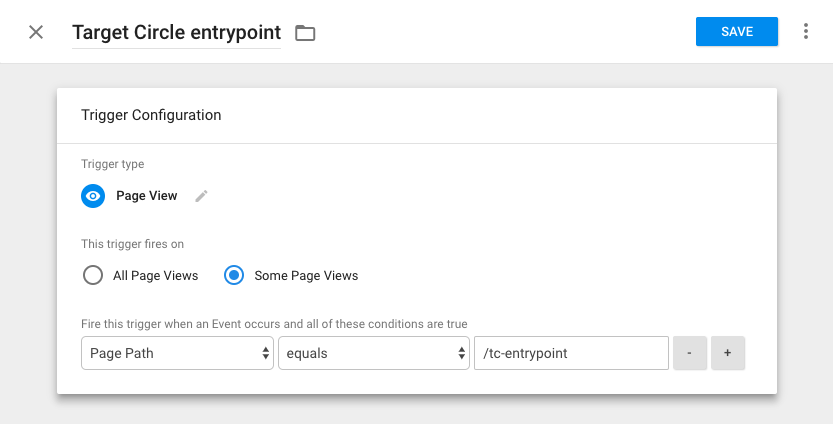
2. Create a new trigger in Google Tag Manager
Choose Page view as “Trigger type” and for “This trigger fires on” choose Some Page Views. As firing conditions you need to set Page Path equals and then set the path of the page you created in step 1, for example /tc-entrypoint.
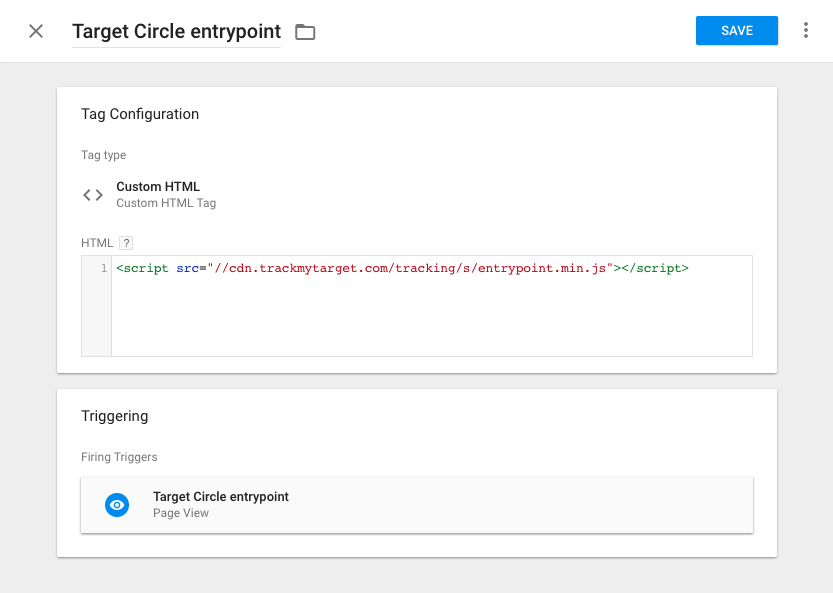
3. Create a new tag in Google Tag Manager
Choose Custom HTML as “Tag type” and paste in the following HTML:
<script src="//cdn.trackmytarget.com/tracking/s/entrypoint.min.js"></script>Then select the trigger you created in step 2.
Creating the checkout tag
1. Create a new trigger in Google Tag Manager
Create a trigger that fires on your confirmation page, in this example, we assume the page path is /thank-you. Keep in mind that the implementation of this trigger might be different for your website.
Choose Page view as “Trigger type” and for “This trigger fires on” choose Some Page Views. As firing conditions you need to set Page Path equals and then set the path of the page you created in step 1, for example /thank-you.

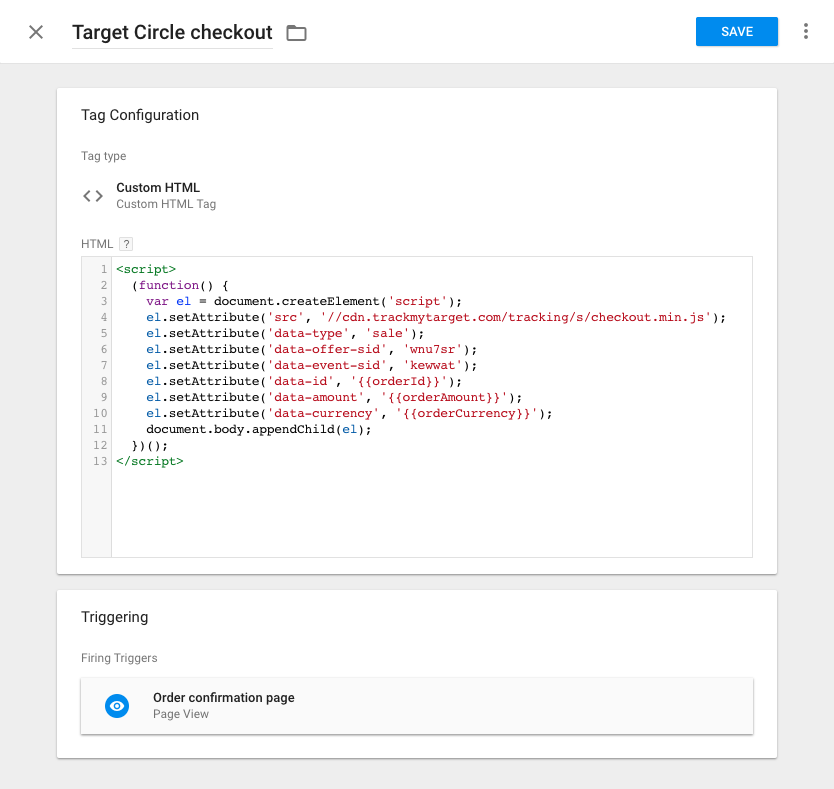
2. Create a new tag in Google Tag Manager
Choose Custom HTML as “Tag type” and paste in the Lead script or the Sale script from below. Before saving the tag, you should replace all the parameter values in the curly brackets {}. Then select the trigger you created in step 1.
Lead script:
<script>
  (function() {
    var el = document.createElement('script');
    el.setAttribute('src', '//cdn.trackmytarget.com/tracking/s/checkout.min.js');
    el.setAttribute('data-type', 'lead');
    el.setAttribute('data-offer-sid', '{offer-sid}');
    el.setAttribute('data-event-sid', '{event-sid}');
    el.setAttribute('data-id', '{id}');
    document.body.appendChild(el);
  })();
</script>
Sale script:
<script>
  (function() {
    var el = document.createElement('script');
    el.setAttribute('src', '//cdn.trackmytarget.com/tracking/s/checkout.min.js');
    el.setAttribute('data-type', 'sale');
    el.setAttribute('data-offer-sid', '{offer-sid}');
    el.setAttribute('data-event-sid', '{event-sid}');
    el.setAttribute('data-id', '{id}');
    el.setAttribute('data-amount', '{amount}');
    el.setAttribute('data-currency', '{currency}');
    el.setAttribute('data-code', '{code}');
    document.body.appendChild(el);
  })();
</script>
Parameters:
-
{offer_sid}required
Replace with 6 character sID of the offer. You can find this value in offer list of the marketplace or ask your account manager. -
{event_sid}required
Replace with the 6 character sID of the product group. You can find this value in the tracking tab when creating or editing an offer or you can ask your account manager. If you want work with multiple product groups, follow these instructions. -
{id}
Replace with the ID you assign to the transactions in your own system. Required if you set up the offer to require unique transaction IDs -
{amount}
Replace with the transaction amount. Do not use any thousand delimiter and use.as decimal delimiter (e.g.1234.56). Required if you want to pay out a percentage of the transaction amount to your publishers. -
{currency}
Replace with the three-letter alphabetic currency code according to the ISO 4217 standard (e.g. EUR ). Required if you are using the amount parameter. -
{code}
Replace with the voucher code used for the order. Accepts all alphanumeric characters, hyphens (-) and underscores (_). Required if you are using voucher code tracking.
Publish changes
Finally, publish the changes you just made to Google Tag Manager.